Alerts and Notifications
GovCIO COMMANDLINK includes alert monitoring and, when permitted, OMNIALERTS composition workflows.
Use the Alerts tab to review active alerts and, when permitted, create OMNIALERTS for broader communication and coordination.
Open Alerts
Open the Alerts tab. When the Alerts tab is selected, the list of active alerts appears. At the very top of the side panel is the Create OMNIALERT button. The active alerts are listed below the button, with the most recent alerts at the top of the list. The Alerts tab includes a badge count that updates dynamically while you are viewing the alerts panel. Active polling for alert updates occurs only while the alerts panel is open.
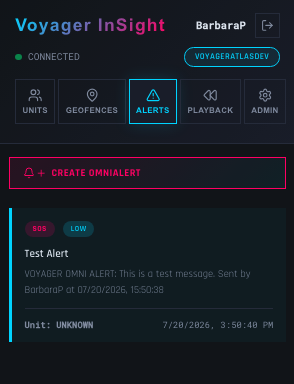
GovCIO COMMANDLINK alerts tab view
The details can be reviewed in the panel. The type of alert, priority, unit information, and timestamps are displayed for each active item. SOS is the alert type for an emergency alert. The priority is indicated by a badge, with High priority alerts shown in red and Medium priority alerts shown in yellow, and Low priority alerts shown in blue. The unit identifier, Sent timestamp, and Server Processed timestamp are also displayed for each alert.
Compose OMNIALERTS
Select Create OMNIALERT. As noted, the Create OMNIALERT button is located at the top of the Alerts tab. Selecting this button opens the OMNIALERTS composer. The OMNIALERTS composer is a form that allows you to create a new notification for other users. The form opens in a side panel.
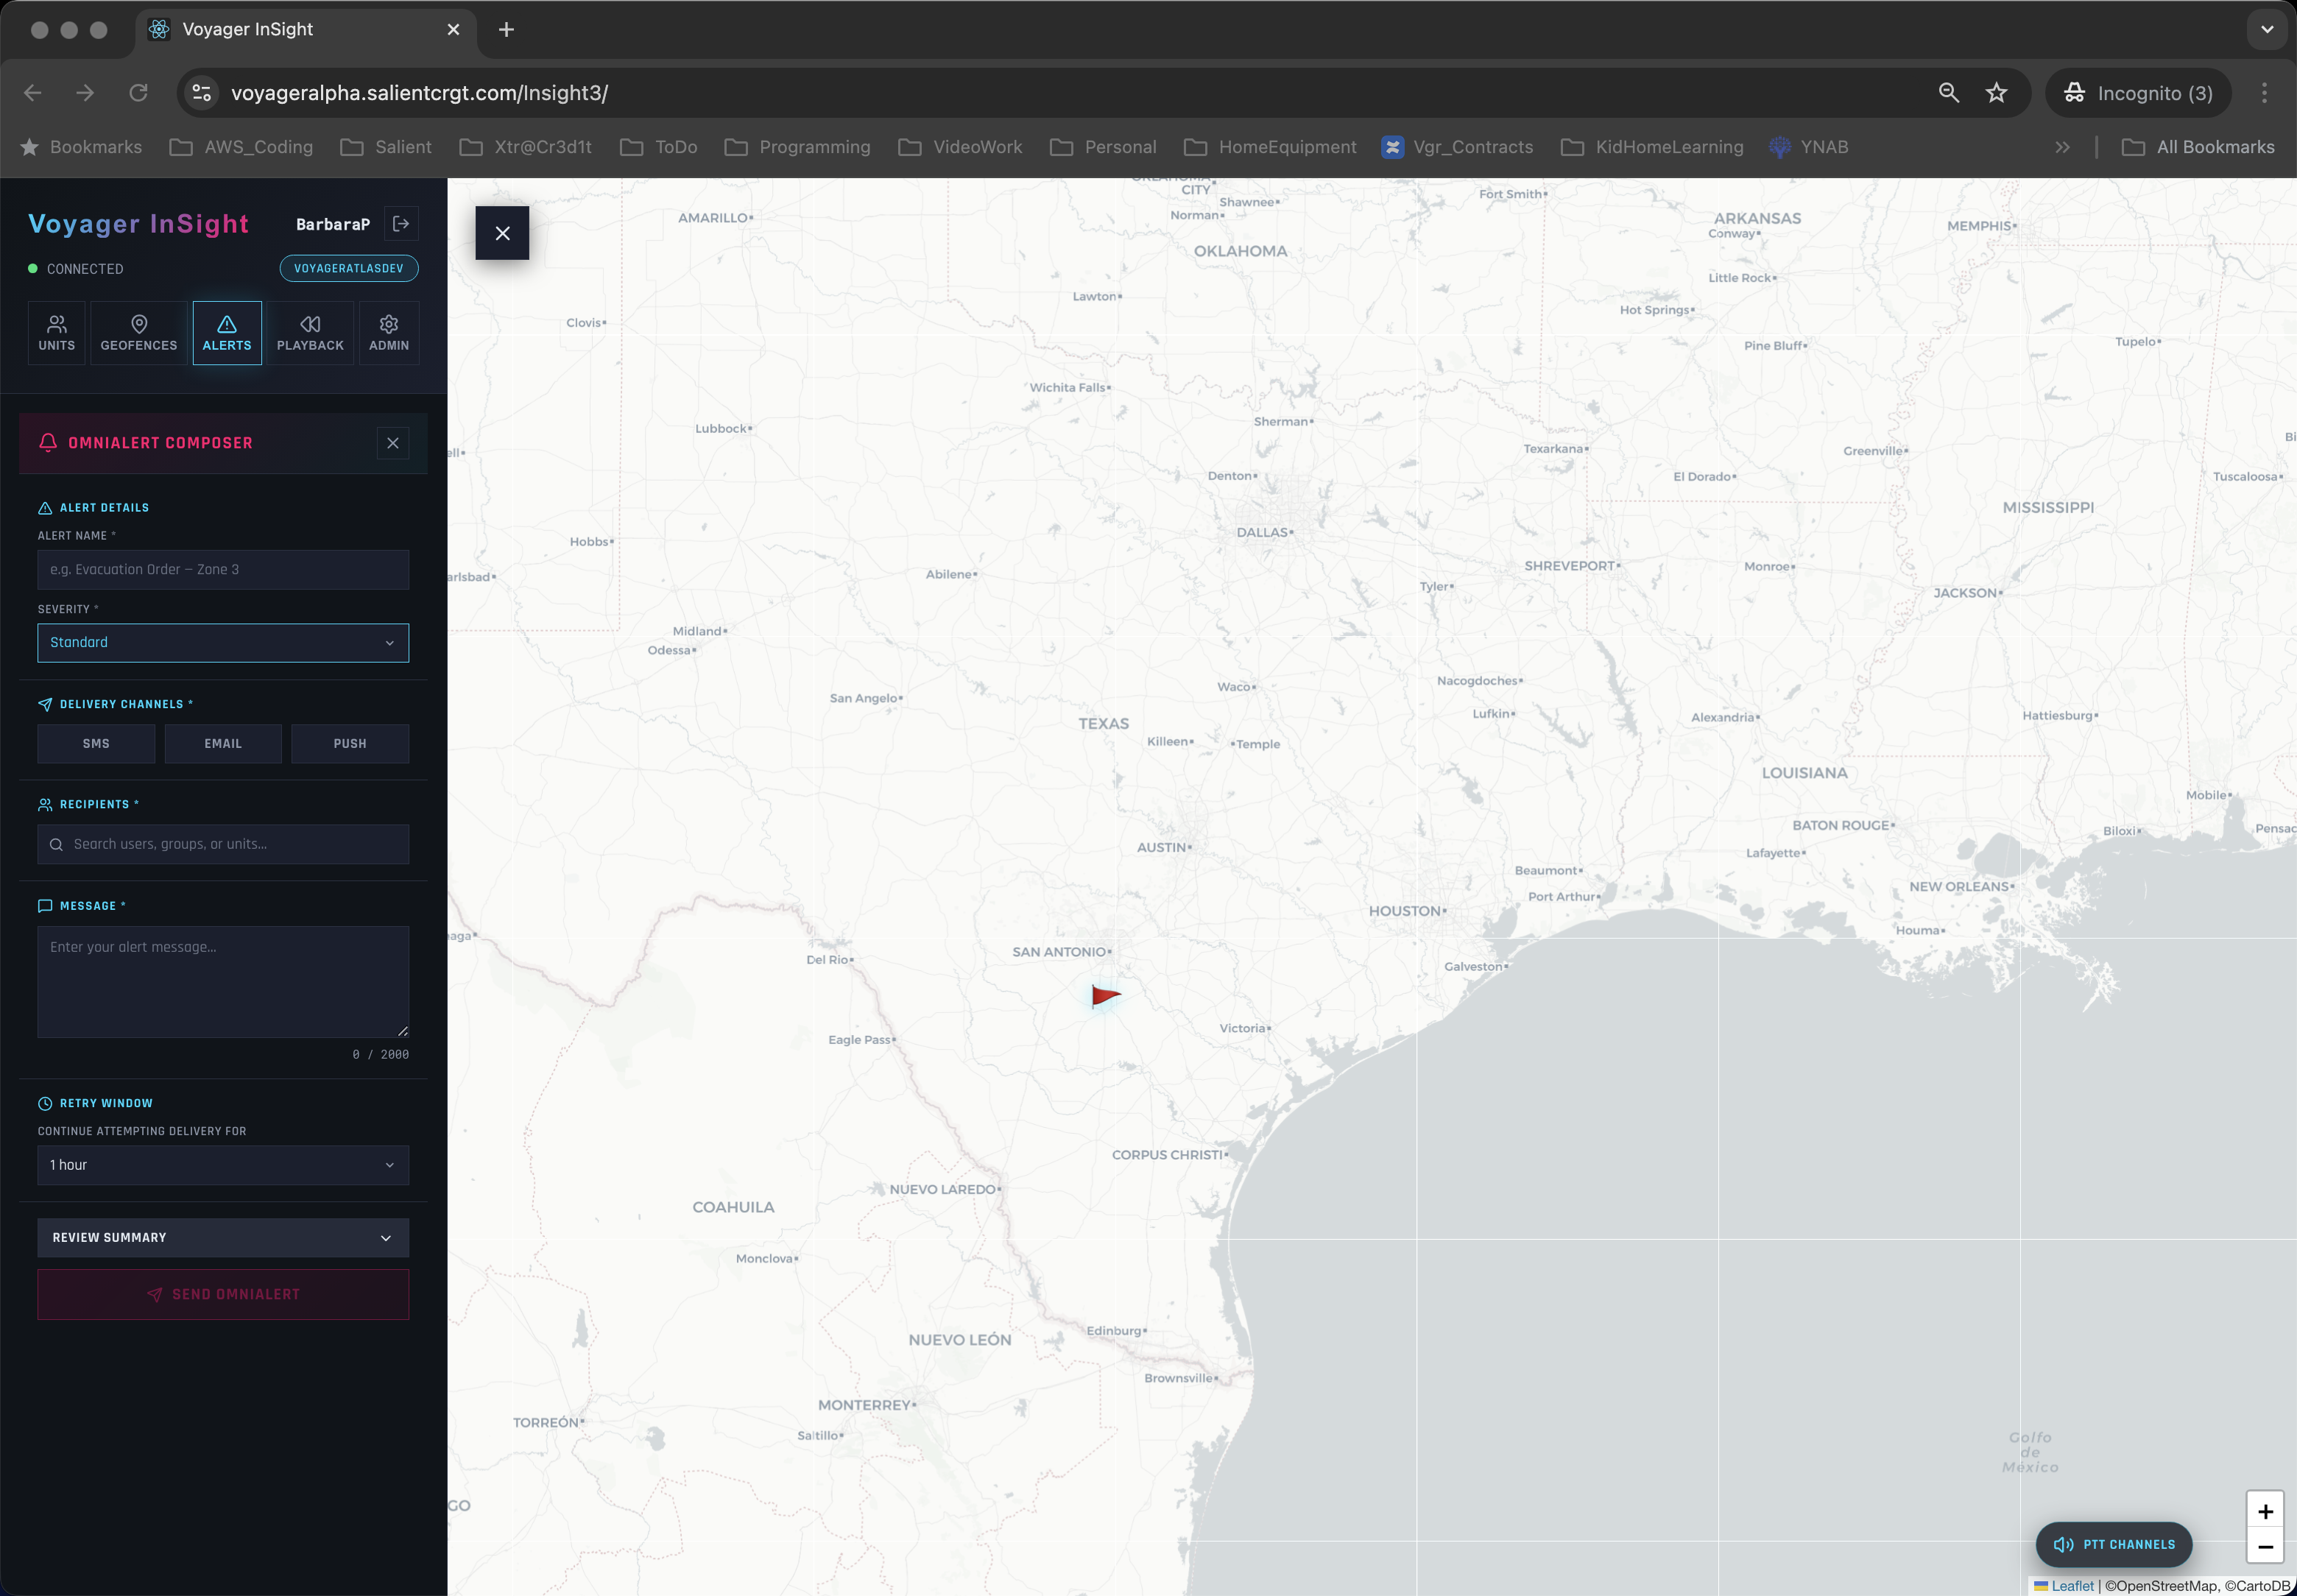
GovCIO COMMANDLINK map and OMNIALERTS composer view
Complete the required fields:
Alert name: Use a short, specific title so users can quickly identify the alert purpose.
Severity: Select the priority level (for example, High, Medium, or Low) based on urgency.
Delivery channels: Choose how the alert is sent (such as in-app notification, email, and SMS where enabled).
Recipients: Select the intended audience, including users, groups, or units.
Message: Enter clear action-focused instructions with the key details users need.
Customize Message By Channel: When available, customize message text for each delivery channel so email, SMS, and push notification recipients receive channel-appropriate wording.
Alert Expiration: Set when the alert should stop being active or visible. Expiration is based on when the alert is sent, not when it is created.
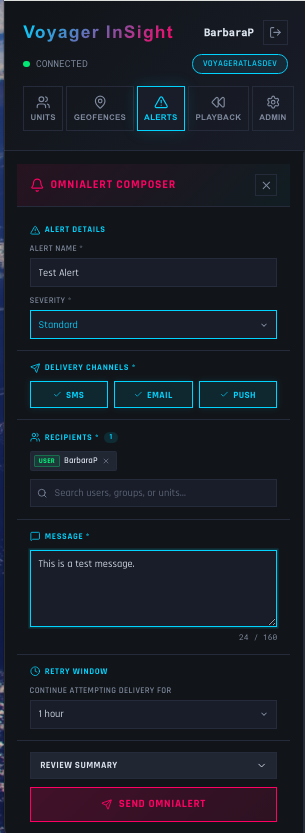
GovCIO COMMANDLINK OMNIALERTS completed composer view
Note
SMS OMNIALERTS are only available for users with a mobile number configured in their profile. If a user does not have a mobile number, the SMS option will not be available for that user.
Send to Multiple Recipients
When sending an OmniAlert message, you can send to multiple recipients in either of these ways:
Add multiple users, groups, or units directly to the Recipients list in the composer.
Create an OMNI List under Admin > OMNI > Lists, then select that list as a recipient when composing the alert.
Use direct recipient selection for one-time messages. Use an OMNI List when the same group of users or units needs to receive repeated alerts.
To add recipients directly, open the OmniAlert composer and select each user, group, or unit that should receive the message.
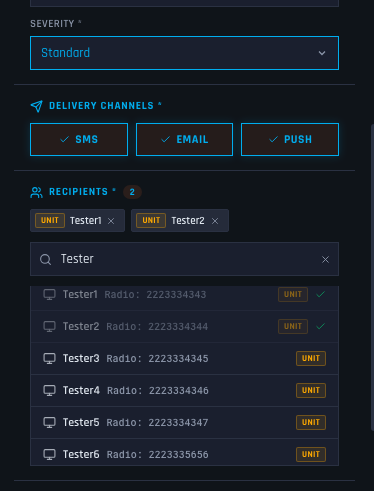
Adding multiple selected users in the OmniAlert composer.
To use a saved list, create or update the list from Admin > OMNI > Lists.
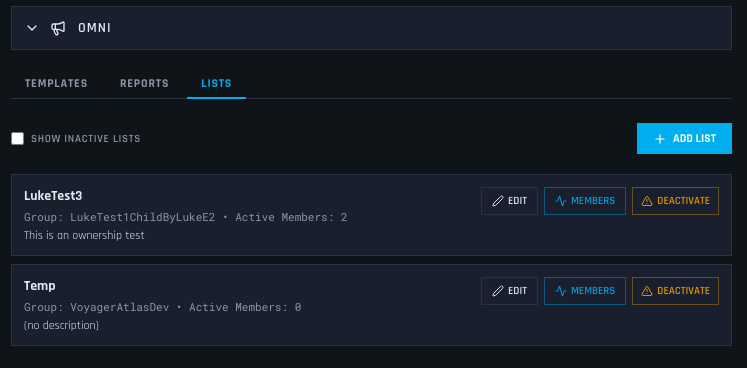
Adding a recipient list in the OmniAlert composer.
In the OMNIALERTS composer, select the saved list from the recipient options.
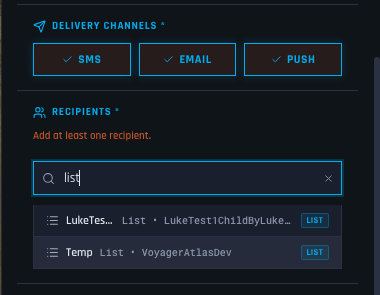
Adding a recipient list in the OmniAlert composer.
At the bottom of the composer, there is an option to review the alert before sending. If you select Review, a confirmation screen appears to allow you to verify the details before sending.
Confirm that severity, channels, recipients, message text, and retry window are correct before sending.
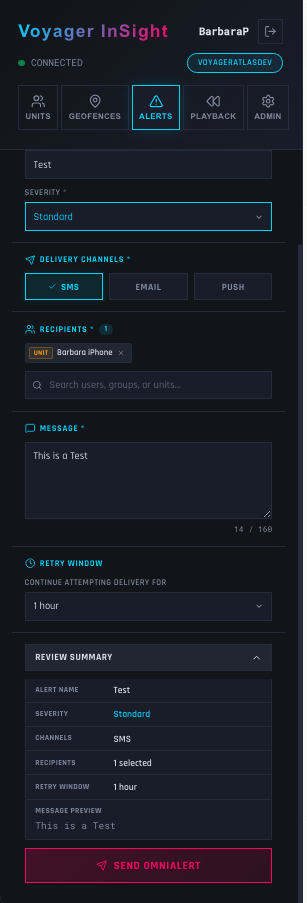
GovCIO COMMANDLINK OMNIALERTS review summary before send
Send and Confirm
Submit the OMNIALERTS.
Before the alert is sent, a confirmation dialog appears for this action so you can verify details before submitting.
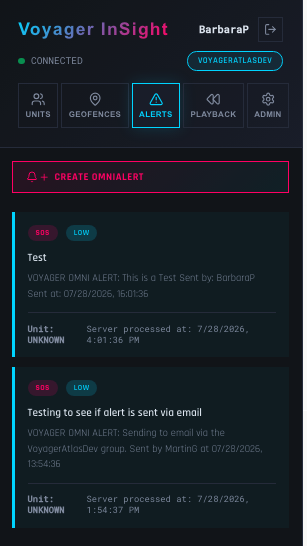
GovCIO COMMANDLINK alerts list with newly created OMNIALERTS entry
Verify that a confirmation screen appears. Additionally, the Alerts tab will flash red to indicate that a new alert has been created. The new alert appears at the top of the active alerts list.
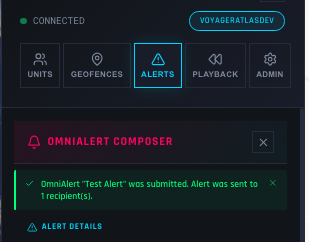
GovCIO COMMANDLINK OMNIALERTS sent confirmation view
Recipients can confirm receipt of the OMNIALERT directly from the notification. When an OMNIALERT is received, a confirmation URL or link appears allowing the recipient to acknowledge the message. Following the link marks the alert as received and logs the acknowledgment with a timestamp.
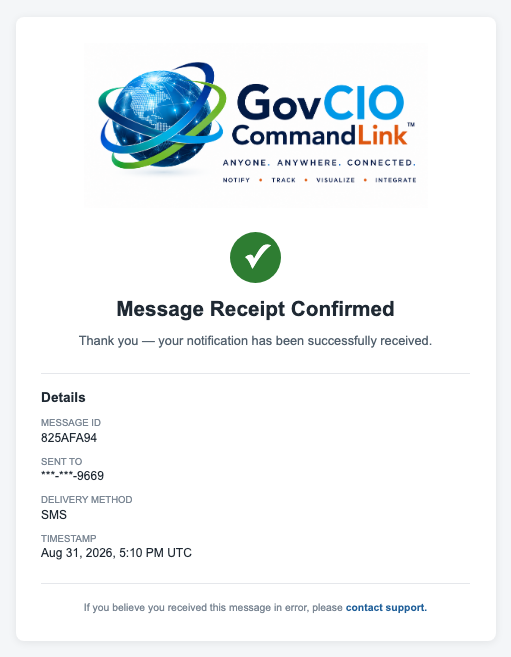
GovCIO COMMANDLINK OMNIALERT receipt confirmation view
Review OMNI Alert Delivery Status
Use the OMNI Alert Dashboard to review delivery and acknowledgment status after an OMNIALERTS message is sent.
Open the OMNI Alert Dashboard by tapping OMNI -> Reports -> OMNI Alert Dashboard (Open Dashboard).
Select an alert to review recipient and delivery-channel status.
Review whether each delivery is active, expired, or acknowledged when those details are available.
If an alert has unacknowledged deliveries, use the resend option when it is available for your role and workflow.
Optionally mark completed alerts as processed in the Alerts list when your workflow requires cleanup. Currently, the X button is available to mark an alert as processed. Selecting the X button opens a modern confirmation modal, similar to group deactivation, to ensure that you want to mark the alert as processed.
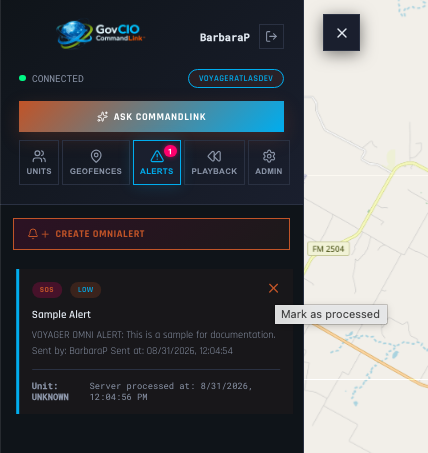
GovCIO COMMANDLINK alert card action to mark an alert as processed
The confirmation modal is the only way to mark an alert as processed. Once confirmed, the alert is removed from the active list and this action cannot be undone. The number listed here will change to reflect the active alert number.
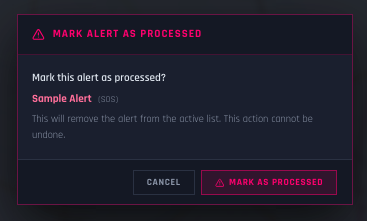
Confirmation prompt shown before marking an alert as processed
Quick Notes
You can send OMNIALERTS to specific users, groups, or units.
You can use OMNI Lists when the same users or units need to be selected repeatedly.
OMNIALERTS templates and alerts may support channel-specific message text for email, SMS, and push notifications.
Available channels can include app notifications, email, and SMS.
The OMNI Alert Dashboard can show delivery and acknowledgment status by recipient and channel.
Timestamp labels now identify both when the alert was sent and when the server processed it.
If the confirmation screen does not appear, review required fields and try again.
Ask CommandLink About an OMNI Alert
When the experimental Ask CommandLink feature is enabled, you can ask questions from the main menu or from an OMNI Alert detail screen.
Select Ask CommandLink from the available location.
Choose a suggested prompt or enter a question.
Review the response before taking action.